


Quick thing before we start - on 30th May (next Friday!) I’m running my next free ‘Boost Your Productivity with Workspace’ livestream over on YouTube. This month I’ll focus on Gemini - demonstrating practical tips for saving time at work and sharing the latest updates. Click here to add it to your calendar (no registration required)!
We all get email we didn’t sign up for. It can be hard to know exactly where it came from and even harder to keep it all organised. There's a Gmail feature that can help you filter your emails like a pro and even pinpoint who might be sharing your address.
Create an alias in Gmail with the + symbol
It sounds a bit technical but it's super simple. Gmail allows you to add a plus sign (+) followed by any word or phrase to your email address. All emails sent to these modified addresses still land in your regular inbox.
For example, if your email is yourname@gmail.com, you could use:
yourname+newsletters@gmail.com when signing up for newsletters
yourname+project@gmail.com for specific work projects
I’m using @gmail.com in these examples, but this will work with your custom Workspace email addresses, too (e.g. dean+newsletters@workspaceboost.com).
Why use it?
Automatically organise your emails: Filters in Gmail could automatically handle emails based on the alias. For example, newsletters could skip the inbox and get filed under a label to read later.
Detect spammers: If you sign up to a newsletter using yourname+newslettername@gmail.com and later start receiving spam to that specific address, you'll know who sold or leaked your email details!
How to use it
The next time you subscribe to a newsletter, create an account, or give out your email, just add a relevant +alias to your Gmail address. For example, if you're signing up for Instagram, you might use yourname+instagram@gmail.com
Set up filters
This is the powerful bit! You can now have Gmail automatically deal with emails coming into the different aliases you’ve used. Here’s how:
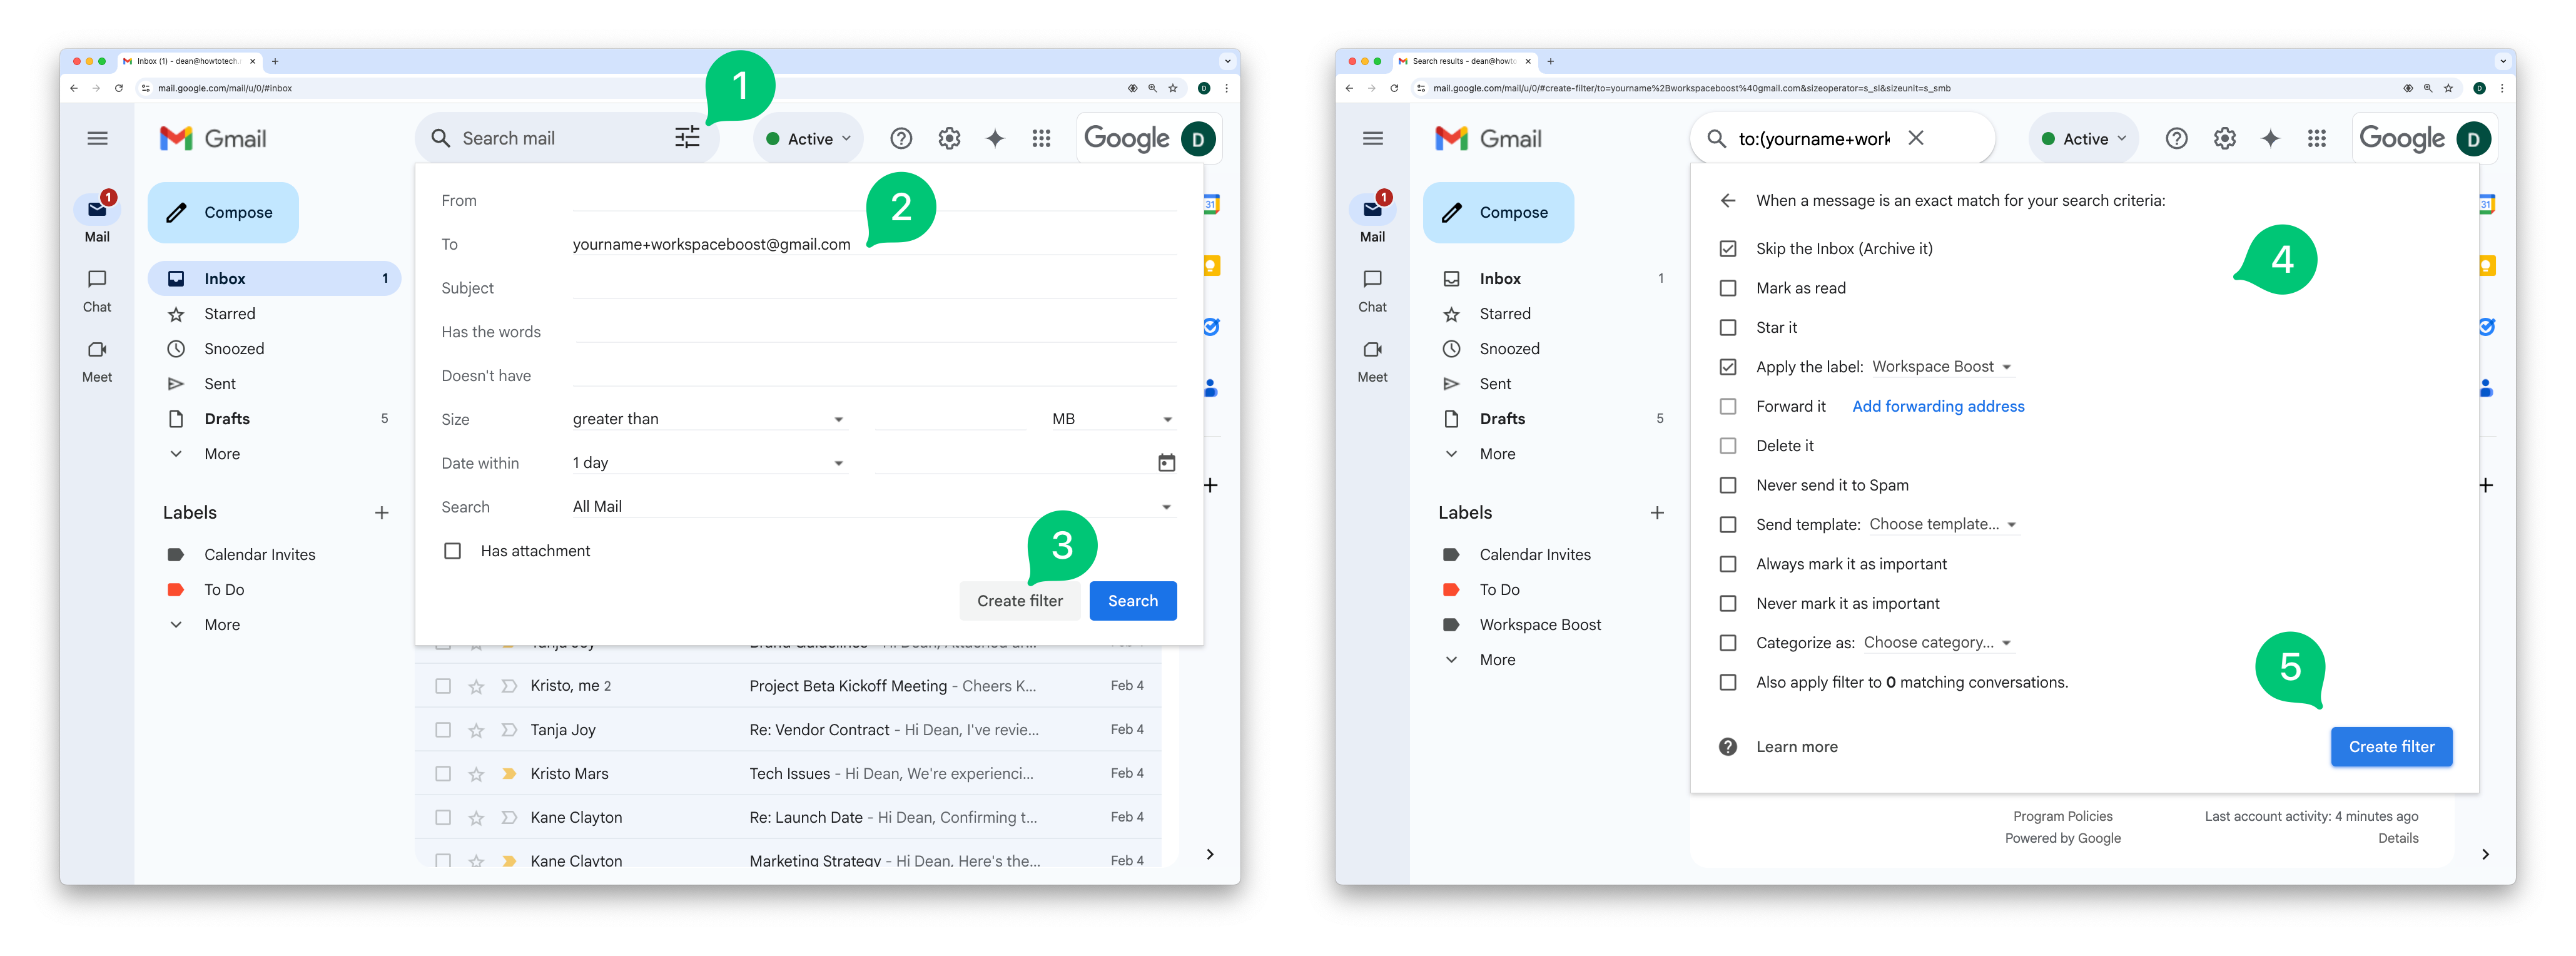
In Gmail, mouse over the search box and click the options button on the right
In the 'To' field, enter the alias you want to automatically organise (for example yourname+workspaceboost@gmail.com)
Click 'Create filter'
Choose what you want Gmail to do with these emails (e.g. 'Apply the label: Workspace Boost', 'Skip the Inbox (Archive it)', 'Mark as read', etc)
Click 'Create filter' again
That’s it! Just repeat it as many times as you need to.
Got any other clever uses for this trick? Share them in the comments below or in our subscriber chat. (Or click the like button if you found this helpful - it makes my day!)
See you next Workspace Wednesday!
Dean
Thanks to you, I used this trick yesterday to test a course I'm publishing. Brilliant! Invaluable! So simple, yet so helpful. Thanks!